It's time for another challenge over at Our Creative Corner and our hugely talented host this month is the lovely Candice. Here's what she has to say with some inspirational images too:
![]()
![]()
I was a little lost at first I have to admit! However, I then remembered that when I was a child we would regularly have Romany folk calling at the door selling small bracelets, lucky charms and such like. My Mother always bought a sprig of heather which she was told would bring good luck and this started an idea in my head!
Here's what I made:
![]()
![]()
![]()
![]()
![]()
![]()
![]()
![]()
![]()
![]()
![]()
![]()
![]()
![]()
![]()
![]()
![]()

Blessed are the gypsies. The makers of music, artists, writers, dreamers of dreams, wanderers and vagabonds, children and misfits: for they teach us to see the world through beautiful eyes. This month's challenge invites you to let us see your gypsy nature.
Gypsies are wanderers, purveyors of exquisite things, mysterious things, free-spirited bohemians curating the beauty of life and sharing the wonders with you as the travel along.
So for the challenge let your creativity run wild and free like a gypsy.
I want you to create interesting items you might imagine finding at a traditional Gypsy Fayre.
You may create whatever your gypsy heart desires, but it must.... contain at least 3 colours from the featured colour palette or show us how your project is inspired by this gorgeous ode to the gypsy soul!

So craft with the soul of a gypsy and share the wonder with us.
Here's what I made:

My own version of a good luck heather sprig with some 'gold' trinkets added for good measure! I presented them all on a tag so they could be sold exactly like this at a Gypsy Fayre.
Here's how I made the 'gold' trinkets to adorn my good luck heather sprig:

Some Fimo clay is rolled out and a cutter is used to cut a heart shape.

A rubber stamp is used to add texture to the clay heart. At this stage, objects made in Fimo need to baked to harden them. Follow the instructions on the packet. I've tried paper clay and air dry clay but I just can't get such crisp imprints from the stamp - must be me!
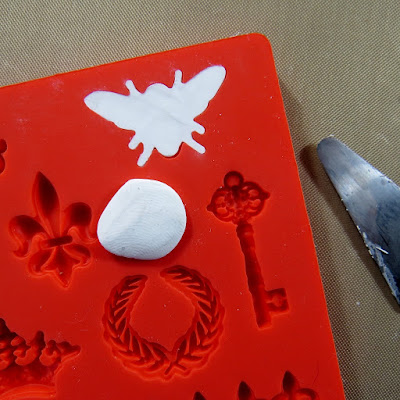
For the bee, a ball of clay is forced into the aperture on a silicone mould. The excess clay is cut away using a spatula.
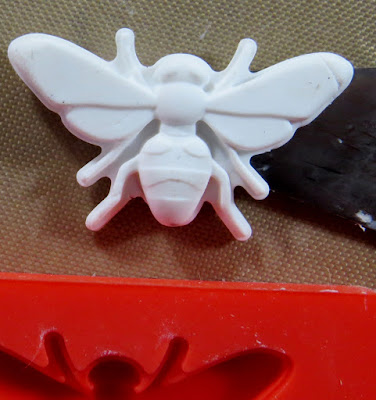
The silicone mould is gently manipulated to release the bee. At this stage, follow the packet instructions for baking your clay pieces.

The clay pieces are sealed with clear gesso followed by a generous coat of gold metallic fluid acrylic. Leave to air dry.

Add crackle glaze to the clay pieces and leave to dry to create those lovely crackles.

Gently rub in some raw umber fluid acrylic to highlight the crackles. Glue a jump ring to the back of each piece to enable it to be used as required.

The bee is used at the top of the tag. It can be easily detached and used by the purchaser. According to old gypsy lore, it's really good luck if a bee flies into a gypsy caravan.

The heart is used to decorate the silk wrapped stems of the heather. Some gold embroidery thread is twisted around the sari silk and through the jump ring on the heart. White heather is allegedly the luckiest because it shows that no blood has been spilt on the battle field in that place. My heather is dried and came from our wonderful holiday on the beautiful north west highland coast of Scotland. I just had to bring it back nearly two years ago - good job I found it again!

The background of the tag is sprayed with three colours close to some of those on the colour inspiration image. I used DecoArt acrylic misters and a water spray for the task. This was followed by more crackle glaze and when dry, some white Antiquing Cream. The excess antiquing cream is removed with a baby wipe and once dry, everything is buffed with a soft cloth.

The gold design started as a thin layer of modelling paste prior to the painting of the background. Once the misters had added colour, the stencil was replaced and the modelling paste was give a good coat of gold metallic fluid acrylic.
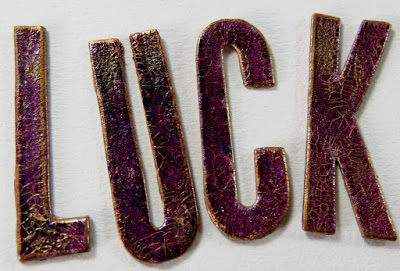
The letters are die cut from scrap card and coloured using two shades of acrylic misters. Next, crackle glaze is added followed by gold fluid acrylic to highlight the crackles. The edges of the letters are coloured with a Krylon pen.

I love those gorgeous rich tones in the background! The little silver 'blob' above the letter U is made using Liquid Glass (DecoArt). This dries in the raised shape as you see it. The 'blob' is coloured with the same gold paint as before prior to the crackle layer being added.
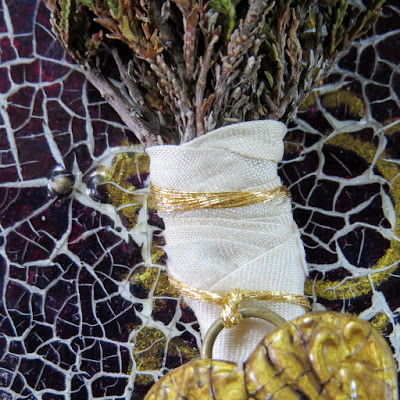
When my Mum bought the heather, the stems were wrapped in silver foil but I had some sari silk scraps and felt these looked so much better!

Finally, the edges of the 'packaging' are finished with some gorgeous green toned Metallic Lustre from DecoArt.
Over at Our Creative Corner you'll see some wonderful projects made by my hugely talented teamies!
Our generous sponsor for this month is:
Can't wait to see how creative you're going to be with this challenge! Thanks for your visit.
This is one of two posts I'm sharing today. If you'd like to see the other one, just click here.